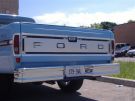
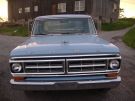
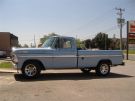
This past weekend I did the PS switch over on my 1971 f-100 360.
I grabbed a complete "kit" off of e-bay a while back that had a used Bendix box, PS pump + pulley + bracket, crank pulley, PS cooler, new belt and new hoses.
I was really pleased with how smoothly things went, no broken bolts and everything lined up nicely. (althought the power steering fluid gave a mighty belch all over my engine compartment when it was pushing air out of the system.)
Only one issue. I can't replace the "pinch bolt" back into the rag joint. It looks like the groove that is on the steering box shaft has either gone too high up, or too low and this stops the bolt from passing throught the ragjoint yoke.
I have had some advice from friends the "reef" on the ragjoint with a pry bar to make it line up but I would rather not damage anything.
Is it possible to adjust the steering colum 1/2" or so until things line up? If so, how do I do this. It looks like there is a clamp near the engine side of the firewall that can be loosened.
I drove it home a short distance but have parked it since last Sunday until I get the bolt in.
It was definately worth the effort, power steering changes the personality of the truck!
Completed PS upgrade sucessfully...but!
Moderator: FORDification
-
OldGuy

- New Member

- Posts: 27
- Joined: Tue Jun 03, 2008 6:25 am
- Location: Toronto
Completed PS upgrade sucessfully...but!
1971 F-100 Ranger 360 auto LWB 2WD 90,000 orig. miles
-
fordman
- 100% FORDified!

- Posts: 22329
- Joined: Sun Aug 28, 2005 8:17 pm
- Location: Kansas, Ottawa
- Contact:
Re: Completed PS upgrade sucessfully...but!
yes the column will adjust. there are two bolts under the dash under the column on either side. just loosen them and push or pull it to make it line up. becareful not to damage the boot on the bottom of the firewall where the column goes through at.
-
fordman
- 100% FORDified!
- Posts: 22329
- Joined: Sun Aug 28, 2005 8:17 pm
- Location: Kansas, Ottawa
- Contact:
Re: Completed PS upgrade sucessfully...but!
what hawkrod is true. the columns arent the same. also if your cab mounts have collasped at all it will also make it harder or im possible to adjust the column becaus eof the distance problem. you can try it it may work. if not you could have other problems or will end up needing a different column.
-
OldGuy
- New Member
- Posts: 27
- Joined: Tue Jun 03, 2008 6:25 am
- Location: Toronto
Re: Completed PS upgrade sucessfully...but!
I tried to research as much as possible before attempting this.
I had read recent posts about the mismatching some people had experienced with steering boxes, firewall brackets, and steering columns, but I seemed to have everything correct going into the job.
I held my breath every step of the way waiting for somekind of misalignment or such but other than this last issue everything lined up nicely and no big surprises.
I will have a look under the dash tonight and see where the current set up is. I really only need 1/2" movement at most.
I assume that the ajustment is made using the bracket with elogated slots. Nothing to loosen on the engine side? That #3668 bracket looks like a stopper bracket.

If the bolt is already at the bottom I am pooched I guess!
Fingers crossed!
I had read recent posts about the mismatching some people had experienced with steering boxes, firewall brackets, and steering columns, but I seemed to have everything correct going into the job.
I held my breath every step of the way waiting for somekind of misalignment or such but other than this last issue everything lined up nicely and no big surprises.
I will have a look under the dash tonight and see where the current set up is. I really only need 1/2" movement at most.
I assume that the ajustment is made using the bracket with elogated slots. Nothing to loosen on the engine side? That #3668 bracket looks like a stopper bracket.
If the bolt is already at the bottom I am pooched I guess!
Fingers crossed!
1971 F-100 Ranger 360 auto LWB 2WD 90,000 orig. miles
-
cdherman
- New Member
- Posts: 178
- Joined: Wed Oct 26, 2005 9:48 pm
- Location: Kansas City, MO
Re: Completed PS upgrade sucessfully...but!
Actually, you should loosen up pretty much everything. The backet on the outside, and the clamp anound the bracket(3668 in your pic, but no, that is not what stops the shaft), as well as the two bolts under the dash. Loosen the clamp on the bottom of the steering shaft -- this will then allow the shaft to slide up into the cab (you will likely see a gap between the top housing of the steering coulum and the steering wheel).
Then use a shim and carefully free up the rubber boot from the column, as it likely is stuck. Its old and brittle and if your tear it, you'll have one more leak....
Now, if you are lucky, you'll be able to move the rag joint back up on the spline shaft out of the PS gear, and replace the bolt.
Now, leave all the other bolts and clamps in the engine bay loose, and get in the cab and HOPE you can slide the column up into the cab till the gap between the steering wheel and column are correct. Otherwise your turnsignal cancel and horn may not work. If you can close that gap, you are golden. Tighten the two bolts under the dash. (If you have space in the slots under the dash, but the column won't move, the rubber boot is likely still stuck)
Now go back under the hood. This last part gets screwed up, and it costs people the lower bearing of the steering column or worse.
First, slide the clamp on the bottom of the SHAFT back up the shaft. This pushes the wedge shaped race back into the lower column bearing, and centers the column and shaft to each other, so that there is no lateral torque on the column/shaft. Tighten.
Now go back in the cab and loosen the two bolts. Nothing should move, but if there was some strain or lateral torque on the tube, it will be released. Retighten those two bolts.
Back under the bood, you may re-tightnen the larger clamp (3668) around the rubber boot and column tube. Have the firewall bracket pushed up against the firewall, but with the the bolts loose, so that it can fine a neutral postition. Finally, last of all, re tighten the bolts that hold the firewall bracket in place. There is a reason why Ford put those large holes in that bracket -- and why they supplied those funky square washers with barbs on the back. The large holes and square washers allow for a good deal of variation in your cab, cab mounts, frame etc. etc.
Do this part in correct sequence, and you'll have a smooth steering that will wear well. Do it wrong and your bottom bearing will die quick and sometimes worse.....
Finally, don't dispair if the stock manual shaft is too long. A machine shop can lathe it off for you and re-attach a little shorter. I would NOT trust just cutting it off with a chop saw and welding back together. Imagine how you will feel when that weld fails and your rag joint busts off while doing 50mph in a curve. With a cliff on the outside.....
65 f-100 SWB, 240 I6, T-18, now swapped to C4 with difficulty. Yeah, I know. Its a 67-72 site. But my frame and entire drive train are just like yours!!!!
-
Hawkrod

- Blue Oval Fanatic

- Posts: 939
- Joined: Tue Mar 01, 2005 12:17 am
- Location: Apple Valley, California
- Contact:
Re: Completed PS upgrade sucessfully...but!
Excellent technical direction, this should be a sticky! Hawkrodcdherman wrote:Actually, you should loosen up pretty much everything. The backet on the outside, and the clamp anound the bracket(3668 in your pic, but no, that is not what stops the shaft), as well as the two bolts under the dash. Loosen the clamp on the bottom of the steering shaft -- this will then allow the shaft to slide up into the cab (you will likely see a gap between the top housing of the steering coulum and the steering wheel).
Then use a shim and carefully free up the rubber boot from the column, as it likely is stuck. Its old and brittle and if your tear it, you'll have one more leak....
Now, if you are lucky, you'll be able to move the rag joint back up on the spline shaft out of the PS gear, and replace the bolt.
Now, leave all the other bolts and clamps in the engine bay loose, and get in the cab and HOPE you can slide the column up into the cab till the gap between the steering wheel and column are correct. Otherwise your turnsignal cancel and horn may not work. If you can close that gap, you are golden. Tighten the two bolts under the dash. (If you have space in the slots under the dash, but the column won't move, the rubber boot is likely still stuck)
Now go back under the hood. This last part gets screwed up, and it costs people the lower bearing of the steering column or worse.
First, slide the clamp on the bottom of the SHAFT back up the shaft. This pushes the wedge shaped race back into the lower column bearing, and centers the column and shaft to each other, so that there is no lateral torque on the column/shaft. Tighten.
Now go back in the cab and loosen the two bolts. Nothing should move, but if there was some strain or lateral torque on the tube, it will be released. Retighten those two bolts.
Back under the bood, you may re-tightnen the larger clamp (3668) around the rubber boot and column tube. Have the firewall bracket pushed up against the firewall, but with the the bolts loose, so that it can fine a neutral postition. Finally, last of all, re tighten the bolts that hold the firewall bracket in place. There is a reason why Ford put those large holes in that bracket -- and why they supplied those funky square washers with barbs on the back. The large holes and square washers allow for a good deal of variation in your cab, cab mounts, frame etc. etc.
Do this part in correct sequence, and you'll have a smooth steering that will wear well. Do it wrong and your bottom bearing will die quick and sometimes worse.....
Finally, don't dispair if the stock manual shaft is too long. A machine shop can lathe it off for you and re-attach a little shorter. I would NOT trust just cutting it off with a chop saw and welding back together. Imagine how you will feel when that weld fails and your rag joint busts off while doing 50mph in a curve. With a cliff on the outside.....
39 Ford Dlx Cpe
59 Tbird 430
60 Lincoln
(2)62 Tbirds
(3)68 Cougar XR7-G's
69 Cougar 428CJ 4 speed
77 1/2 F250 4X4
86 SVO
76 F250 Crew Cab
67 F250 Ranger
http://www.supermotors.org/registry/veh ... 9&detail=1
59 Tbird 430
60 Lincoln
(2)62 Tbirds
(3)68 Cougar XR7-G's
69 Cougar 428CJ 4 speed
77 1/2 F250 4X4
86 SVO
76 F250 Crew Cab
67 F250 Ranger
http://www.supermotors.org/registry/veh ... 9&detail=1