Hello all
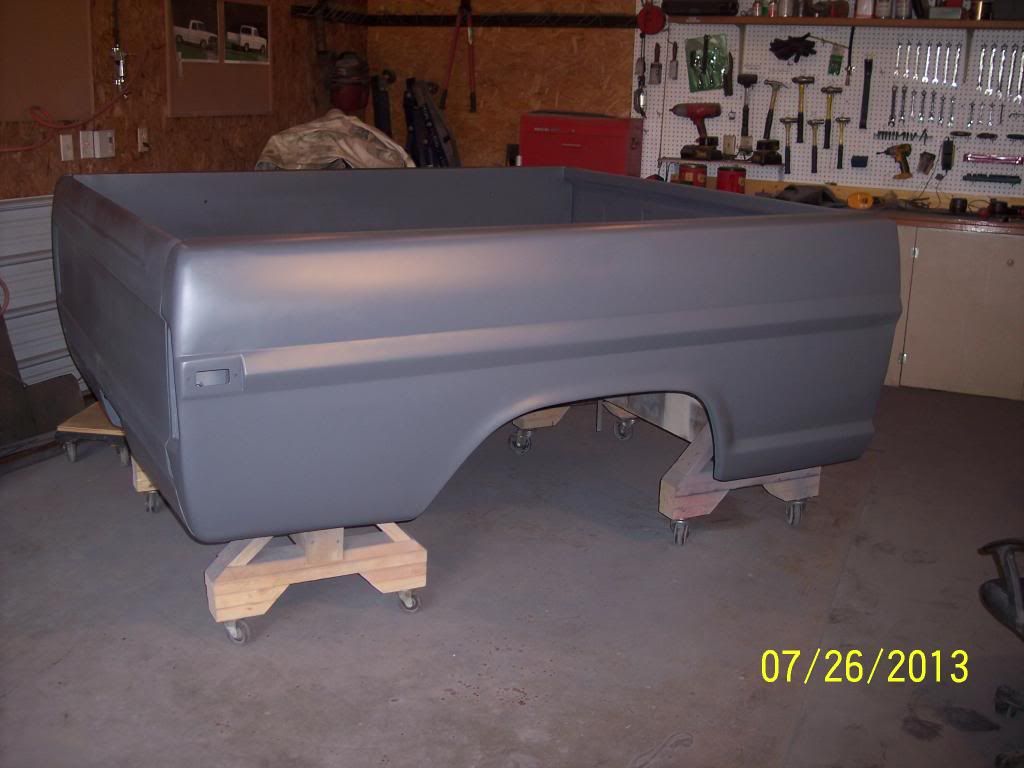
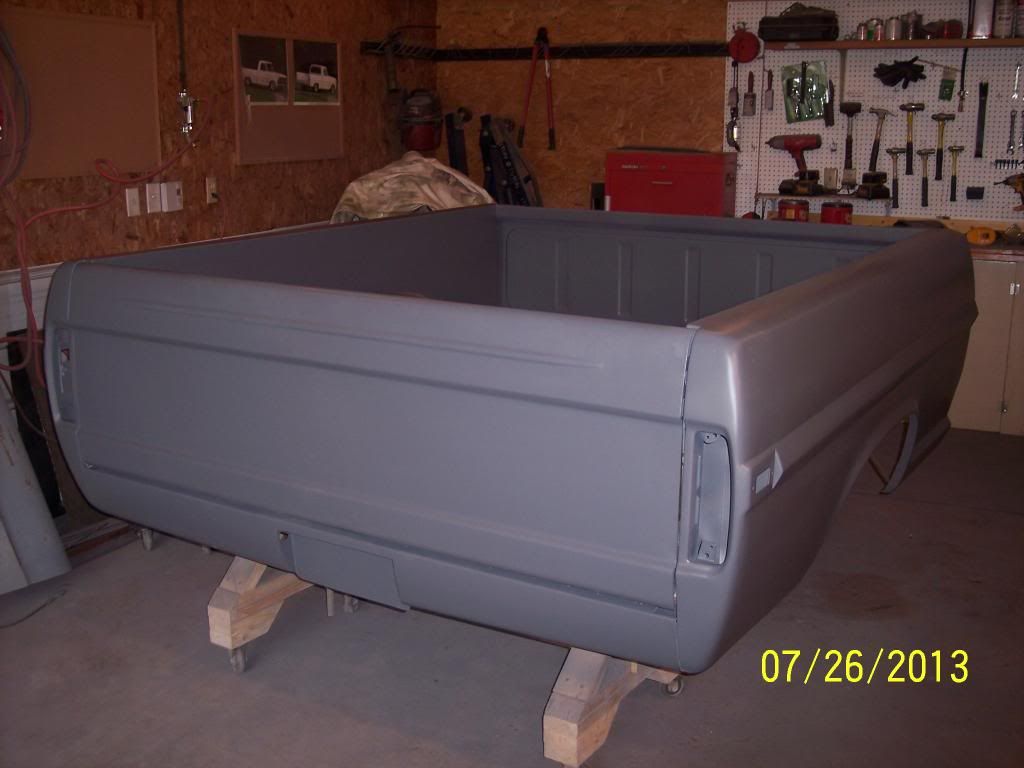
I'm starting the body work on my bump. I'm no expert but I have a question. The gap above the trim , I started to clean it and it had caulk in the crease which I don't think is right. Anyway I want to weld it together and smooth it out. Any comment would be great Thanks
Bed seal above trim
Moderator: FORDification
-
hbpaint
- New Member

- Posts: 4
- Joined: Wed Jan 29, 2014 1:59 pm
Bed seal above trim
You do not have the required permissions to view the files attached to this post.
- Mancar1
- 100% FORDified!

- Posts: 5390
- Joined: Thu Jun 10, 2010 8:13 am
- Location: USS Gramps Garage (DD-727) Tehama County, Northern Ca.
Re: Bed seal above trim
If u weld the seam make sure you clean it out good and treat it with rust converter before welding it up. It does create a clean look.hbpaint wrote:Hello all
I'm starting the body work on my bump. I'm no expert but I have a question. The gap above the trim , I started to clean it and it had caulk in the crease which I don't think is right. Anyway I want to weld it together and smooth it out. Any comment would be great Thanks
May your sails stay full, and your knots not slip. Unless a slip knot.
Once I thought I was wrong, but I was wrong.
Life is a banquet, and every days a feast.
68 F-250 CS 390 C-6 P/S A/C front disc. 2nd owner.
2016 GMC Terrain Denali 301 HP V-6 AWD.
2009 Silverado Crew Cab, V-8, 4X4.
DD-727
DD-806
AE-35
LSD-39
AS-41
AR-8
Once I thought I was wrong, but I was wrong.
Life is a banquet, and every days a feast.
68 F-250 CS 390 C-6 P/S A/C front disc. 2nd owner.
2016 GMC Terrain Denali 301 HP V-6 AWD.
2009 Silverado Crew Cab, V-8, 4X4.
DD-727
DD-806
AE-35
LSD-39
AS-41
AR-8
- sargentrs
- 100% FORDified!

- Posts: 9866
- Joined: Fri Jun 22, 2007 9:30 am
- Location: Georgia, Jasper
Re: Bed seal above trim
From the factory, that was filled with a seam sealer similar to what's in the drip rail and the seam on the outer firewall. Others here gave welded it up with good results. Maybe somebody will chime in with what they did.
Randy
1970 F100 Sport Custom Limited LWB, 302cid, 3 on the tree. NO A/C, NO P/S, NO P/B. Currently in 1000 pcs while rebuilding. Project thread: http://www.fordification.com/forum/view ... 22&t=59995 Plan: 351w, C4, LSD, pwr front disc, p/s, a/c, bucket seats, new interior and paint.
1987 F-150 XLT Lariat, 5.0/C6 auto.
-
hbpaint
- New Member

- Posts: 4
- Joined: Wed Jan 29, 2014 1:59 pm
Re: Bed seal above trim
Thanks for the info
-
Joe_68_F100
- New Member

- Posts: 64
- Joined: Tue Oct 18, 2011 11:36 am
Re: Bed seal above trim
You will need to clean the seam really good no matter what you do. Depending on how handy you are with a welder - you may make more work for yourself than you fix. I've had three of these truck beds that would have required significant filler work to completely eliminate the seem. Ford's quality control wasn't exactly stellar back in the day when they lined up the panels on most of these trucks. Check the back end where the tail light panel meets up with the upper and lower bed sides. I've seen (and owned!) several of these where there was a major difference between the passanger and drivers side in the width of the seam at the back corners. Getting that clean look - as if there is no seam - requires leveling the upper and lower bed sides the whole way down the bed. If you're a pro or a really good body man - that might not be a problem. I did whatever I could and paid a pro to fix it or finish the rest for my whole truck. Smoothing out that seam was too much for me to do, and I couldn't afford to pay a pro to do it!
I re-sealed mine and am pleased with the results. I cleaned the seam, gave it a good coating of converter/encapsulator. I ran a line of tape above and below the seam about 1/8" or so apart - as wide as you want the seam sealer. Then ran a thin bead of seam sealer down the seam. Use whatever tool you can find and run over the bead to clear off the excess sealer in a uniform manner and to give the bead the shape you want. I used an old nail set. I then peeled back the tape, let the sealer set up and primed it. If you screw up the bead, just wipe it off and try again.
I re-sealed mine and am pleased with the results. I cleaned the seam, gave it a good coating of converter/encapsulator. I ran a line of tape above and below the seam about 1/8" or so apart - as wide as you want the seam sealer. Then ran a thin bead of seam sealer down the seam. Use whatever tool you can find and run over the bead to clear off the excess sealer in a uniform manner and to give the bead the shape you want. I used an old nail set. I then peeled back the tape, let the sealer set up and primed it. If you screw up the bead, just wipe it off and try again.
- Randle
- New Member

- Posts: 221
- Joined: Mon Oct 25, 2004 7:21 pm
- Location: Western Kentucky
Re: Bed seal above trim
hbpaint
Welding and smoothing these seems can give the truck a lot smoother look. Clean the seams good and just make a lot of tacks you don't want to weld much at a time because it will warp and cause a lot of extra work. Also try not to carry to much metal, if you’re careful you can keep it below flush and eliminate a lot of grinding, which can also warp the metal. It's a lot of work but if that's the looks you want it is worth it. Here is a couple pictures of what I have done on mine, I have just finished my body work and started on my frame now. I hope this helps.


Welding and smoothing these seems can give the truck a lot smoother look. Clean the seams good and just make a lot of tacks you don't want to weld much at a time because it will warp and cause a lot of extra work. Also try not to carry to much metal, if you’re careful you can keep it below flush and eliminate a lot of grinding, which can also warp the metal. It's a lot of work but if that's the looks you want it is worth it. Here is a couple pictures of what I have done on mine, I have just finished my body work and started on my frame now. I hope this helps.

