Dcopr
Removing side molding/trim ?
Moderator: FORDification
-
dcopr
- New Member

- Posts: 10
- Joined: Thu Dec 15, 2005 11:52 am
Removing side molding/trim ?
I am going to start getting my 1968 f100 ready for paint. I need to remove trim without damaging it. HOW , is there a special tool for this?
Dcopr
Dcopr
-
acemang
- New Member
- Posts: 17
- Joined: Thu Jan 12, 2006 10:36 pm
- Location: Utah, Logan
- Contact:
-
jor

- Blue Oval Fan

- Posts: 682
- Joined: Fri Jul 23, 2004 9:28 am
- Location: Arizona, Tucson
re: Removing side molding/trim ?
I just took the trim off of my 68. I'm going to fill the holes as I like the look better without the trim. I'm going to sell it all on eBay I guess. Anyhow, I found that the trim that runs the length of the truck is held on by a combination of bolts and clips. Once I located all the bolts the nuts came off fairly easy with a nut driver or a 1/4" drive socket. Here's a couple of photos of the bolts and nuts. Regarding the plastic clips, I broke every one taking off the trim but didn't damage the trim at all. If you can't locate all the bolts (you get to one by taking off the tail light), post and I'll photograph the trim laid out on the garage floor.
jor
jor
You do not have the required permissions to view the files attached to this post.
-
FORDification

- Site & Forum Admin

- Posts: 8050
- Joined: Sun Jul 11, 2004 12:52 am
- Location: Kansas, Wellsville
- Contact:
re: Removing side molding/trim ?
Each end of the trim has bolted-on clips and the middles are snapped onto plastic clips, which are riveted to the body. As jor mentioned, you can get access to the nuts for the end clips. He mentioned removing the taillight for the back one. The front one is accessed by popping out a body plug at the front of the box (inside) on each side:

If you want to remove it the easy way though, simply get a thin piece of tin, maybe 1" wide by about 6" long and put a 90° bend on the end of it about a 1/8" wide. Then just carefully slide it up under the edge of the trim to release the clip. It''s very easy, and you don't have to worry about bending or denting the thin trim. Doing it this way also makes reinstalling the trim a LOT easier. Of course, the clip will remain attached to the body, which shouldn't be a problem unless you're needing access to that little area for sanding/painting.
If you want to remove it the easy way though, simply get a thin piece of tin, maybe 1" wide by about 6" long and put a 90° bend on the end of it about a 1/8" wide. Then just carefully slide it up under the edge of the trim to release the clip. It''s very easy, and you don't have to worry about bending or denting the thin trim.
____| \__
-O-----O- Keith
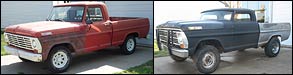
'67 F-100 2WD SWB ~ '69 F-100 4WD SWB w/7" chop ~ 1975 F-250 Ranger XLT Supercab Camper Special

My '67 restoration video
-> Posting and you! <-a MUST watch for all!!
-O-----O- Keith
'67 F-100 2WD SWB ~ '69 F-100 4WD SWB w/7" chop ~ 1975 F-250 Ranger XLT Supercab Camper Special
My '67 restoration video
-> Posting and you! <-a MUST watch for all!!
-
dcopr
- New Member
- Posts: 10
- Joined: Thu Dec 15, 2005 11:52 am
re: Removing side molding/trim ?
Thanks guys, This site has a wealth of info... I would have never thought to look behind the bed plug or taillight assembly. Thanks again.
Dcopr
Dcopr