How I replaced a short wide bed floor.

Moderator: FORDification

Post Reply
Aesop
New Member
New Member
Posts: 57
Joined: Mon Nov 21, 2005 12:12 am
Location: Washington

How I replaced a short wide bed floor.

Post by Aesop »

First, buy a bed.
Image
There is some rust, but I can just buy a reman bed floor!
Image
Image
Image
Image
Image
Then you realize that there are no replacement panels to fix the entire floor unless you want a patchwork quilt. The "patch" panels are just that, they are made to scab in a small section so you don't leave a trail of gravel from the quarry. In order to get the correct die stampings to fit the carriage bolts and the rear bed taper is to scab another bed floor.
Last edited by Aesop on Tue Jan 21, 2014 12:13 am, edited 4 times in total.
67 F250 4x4
Aesop
New Member
New Member
Posts: 57
Joined: Mon Nov 21, 2005 12:12 am
Location: Washington

Re: How I replaced a bed floor.

Post by Aesop »

After buyers remorse sets in and it dawns on you that you have just bought a bed for $200 that is worth $40 at a scrap yard, and your girlfriend is laughing at the stupidity of the situation, male stubbornness sets in and you buy another $200 bed for parts. Unfortunately she is just laughing harder now.
Image
Image
Image
Start cutting. Don't be afraid. I wacked off the front of the bed first with a cutting wheel. Didn't even save the trim, ARO wrist twister die grinder turned into a block of ice. Cut the floor to leave the bed stiffener attached to the front face of the bed. You will need this.
Image
Image
Image
This is the point that you need a spot weld cutter. Carefully uncork the side posts and peel it away. Do not remove the bed mount. Don't be scared, buy just enough replacement cutters to last through a six pack of Widmer.
Last edited by Aesop on Tue Jan 21, 2014 12:21 am, edited 3 times in total.
67 F250 4x4
Aesop
New Member
New Member
Posts: 57
Joined: Mon Nov 21, 2005 12:12 am
Location: Washington

Re: How I replaced a bed floor.

Post by Aesop »

Now You need to uncork the front of the bed you are saving. Leave the floor mostly intact at this point, it will keep the box square. Use a drill this time, no need to waste your spot weld cutter bits. Measure like you mean it. Take top and bottom front panel measurements before you tear it out. These boxes were hand spot welded in, you need to copy the original.
Image
Cut the bed floor back enough to remove the bed mount/stiffener.
Image
Last edited by Aesop on Sun Oct 13, 2013 5:16 am, edited 1 time in total.
67 F250 4x4
Aesop
New Member
New Member
Posts: 57
Joined: Mon Nov 21, 2005 12:12 am
Location: Washington

How I replaced a bed floor.

Post by Aesop »

Buy more beer. you are so committed at this point your girlfriend getting a bit irked. Don't be scared, she will be so impressed at your mad sheet metal skillz her undies will hit the ground like apples in August. Weld in the front panel.
Image
Image
Now you can hack like the wind and remove the serviceable bed floor. 2 to 3 beers should get it done.
Image
Image
Image
Only spot weld cutters after this point, save the rusty "new" metal.
Last edited by Aesop on Tue Jan 21, 2014 12:25 am, edited 1 time in total.
67 F250 4x4
Aesop
New Member
New Member
Posts: 57
Joined: Mon Nov 21, 2005 12:12 am
Location: Washington

How I replaced a bed floor.

Post by Aesop »

Now remove the wheel houses. This is nasty because of the undercoating. I use a wire wheel on a die grinder to make this toxic dust in order to see the spot welds.
Image
Image
Image
Image
Now fix that used floor as best as you can. Mine is caved in so it is flipped over and I hammered the major dents out. Remove all bed mount stiffeners at this time. Weld up the bed mount holes and grind them smooth. I saved the bed pans aft of the wheel houses but they needed to be shortened.
67 F250 4x4
User avatar
jimmy828
100% FORDified!
100% FORDified!
Posts: 1611
Joined: Thu Dec 23, 2010 6:47 pm
Location: asheville,NC

Re: How I replaced a short bed floor.

Post by jimmy828 »

I'm digging the post on repairing bed. I just gained a lot of info from your post. I'll be tackling mine next year but installing a wood floor. What i need to know is, can i accomplish this project without BEER? :D
Aesop
New Member
New Member
Posts: 57
Joined: Mon Nov 21, 2005 12:12 am
Location: Washington

Re: How I replaced a short bed floor.

Post by Aesop »

Now you can remove the offensive rotted bed. I used the die grinder. The Oxycontin the Emergency room doctor gave me was awesome with just a few beers. The rusted steel shard in my cornea made me wary of not wearing safety glasses, and the hijinx and hilarity that ensues after ignoring this advice.
Image
Image
Now you replace the rusted out inner side panels you were hoping beyond hope to save. I just cut pieces from the good bed for this. I used a big section of angle iron sprayed with MIG anti-splatter as a backup to help curb the warping. Remember, never let splatter and anti-splatter occupy the same space.
Image
Image
Image
Last edited by Aesop on Sun Oct 13, 2013 5:11 pm, edited 2 times in total.
67 F250 4x4
Aesop
New Member
New Member
Posts: 57
Joined: Mon Nov 21, 2005 12:12 am
Location: Washington

Re: How I replaced a short bed floor.

Post by Aesop »

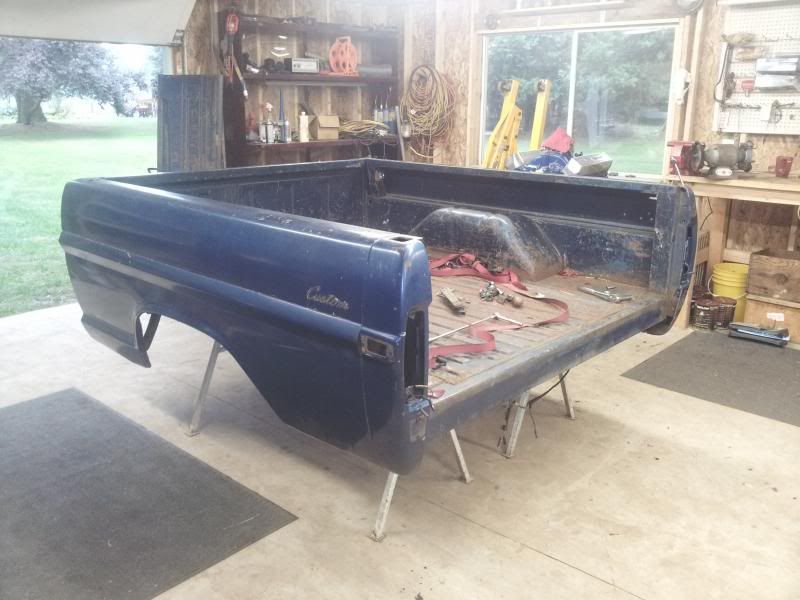
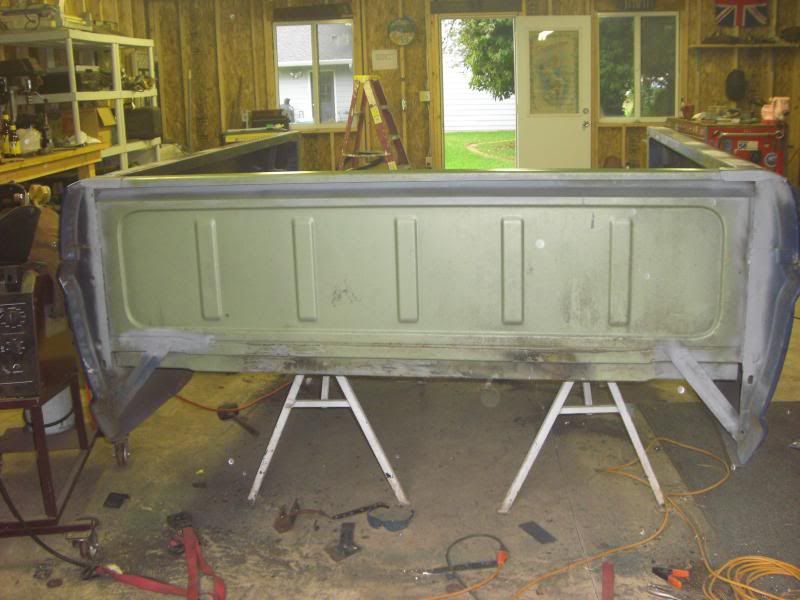
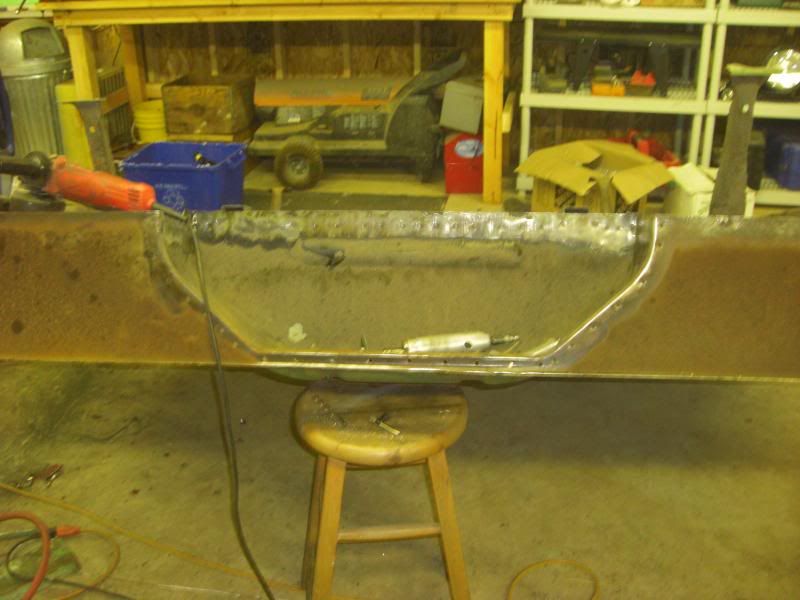
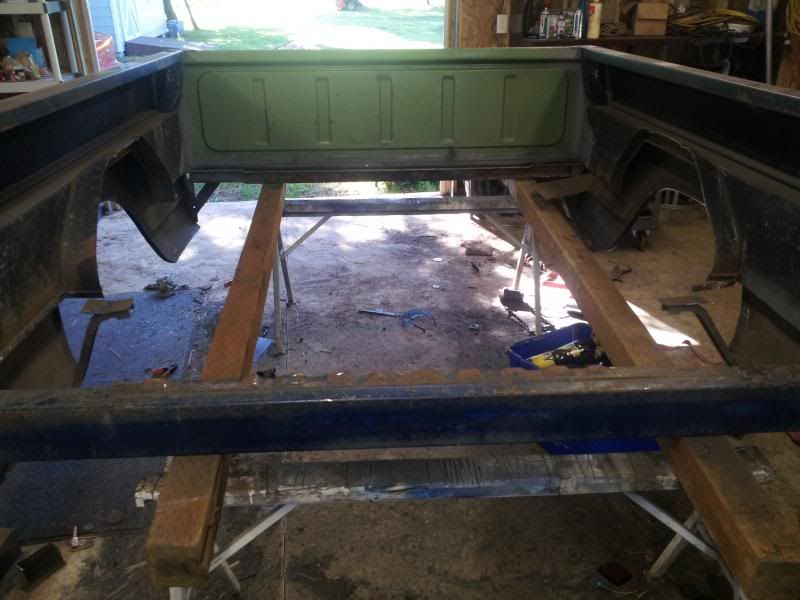
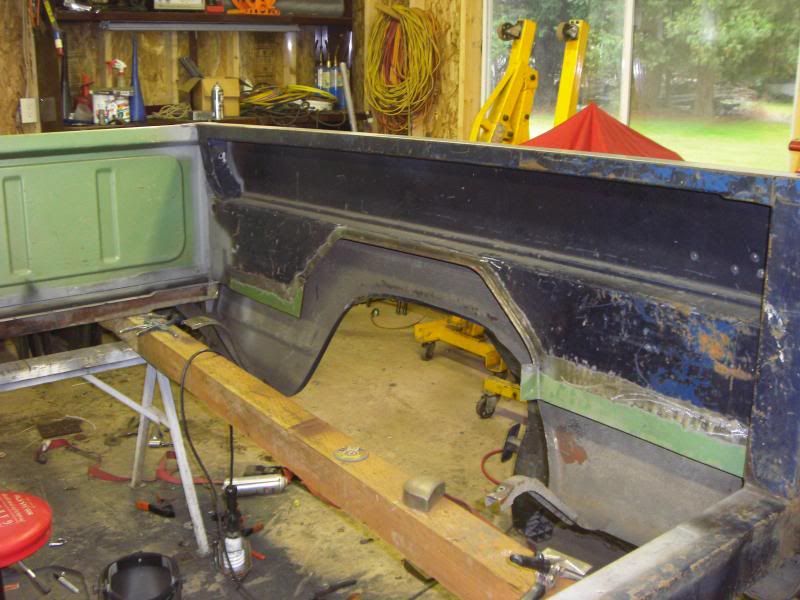
Now it is time to cut the floor to fit. Ford was using the exact same stamped floor for the long bed and short bed. Only the carriage bolt holes are different. There is a set of stampings for the short bed in every long bed floor. Weld up the old holes like I said earlier, and 2 inches aft is the new bolt forms. Weld the underside box mounts with the measurements from the short box. Cut the bed floor from the front side only. The wheel houses from the long bed must be removed from the floor and moved aft to fit the short bed.
Image
Image
Image
Slide in the floor and then check measurements you made while drinking beers. This will add to the merriment of your girlfriend when the tape measure sails over the neighbors house. Personally, I lucked out.
Image
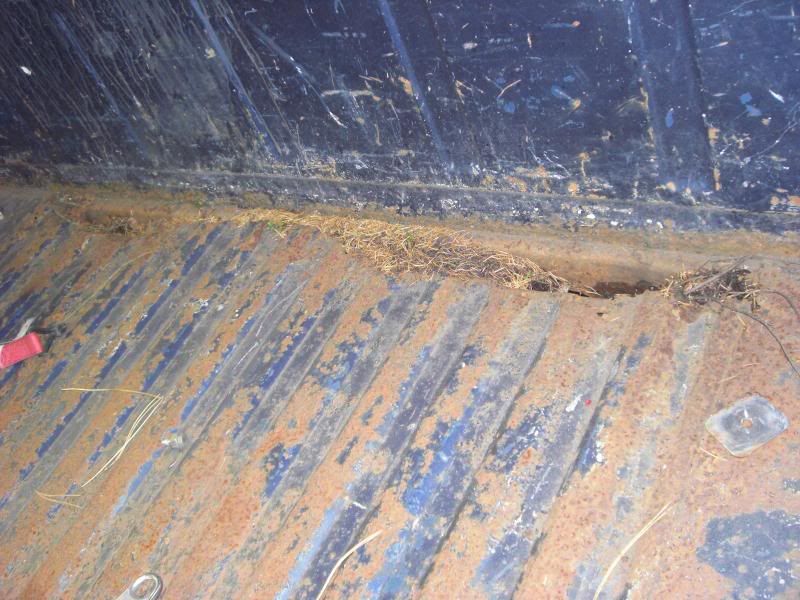
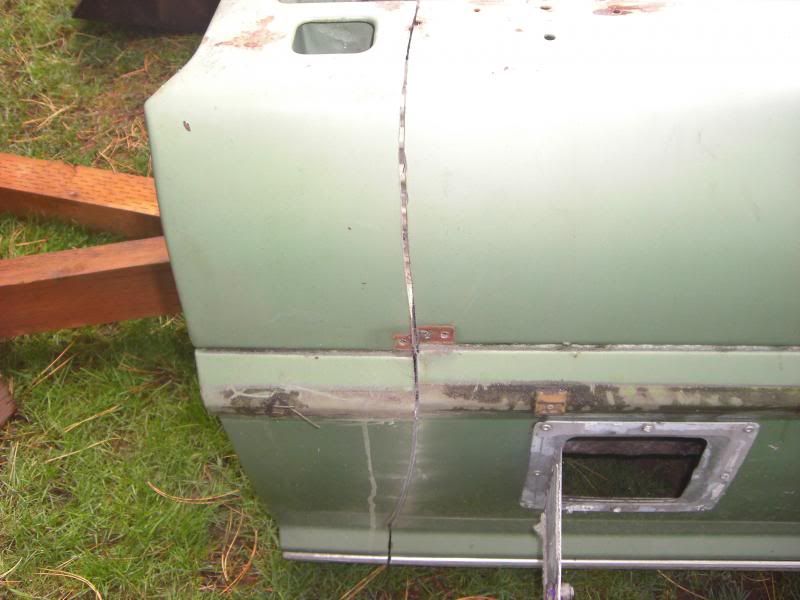
However, the bed floor warped after the massive beating into shape and reweld of box mounts. You have to ensure alignment before you start welding this puzzle back together. If not, then when you bolt it to the frame it will be under tension, prone to cracking, and will cause oil canning. I just used 4x4 posts and straps at the mount stiffeners.
Image
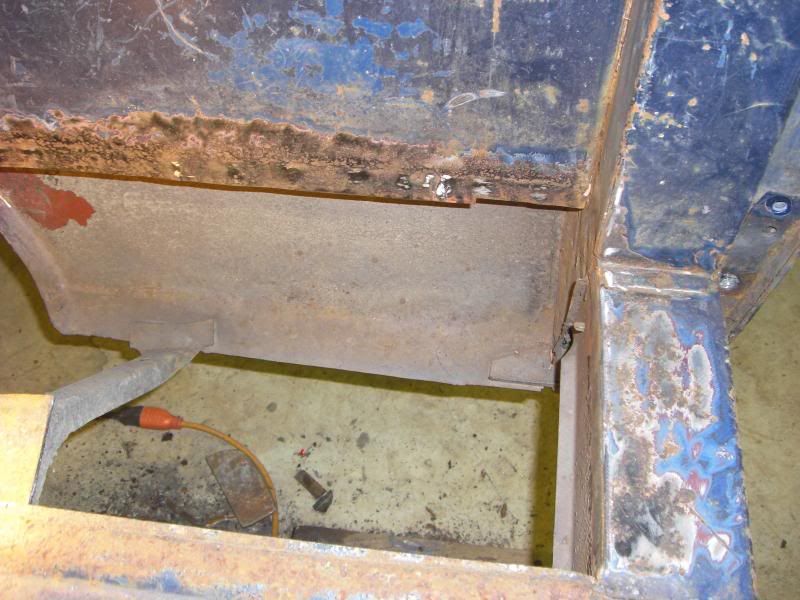
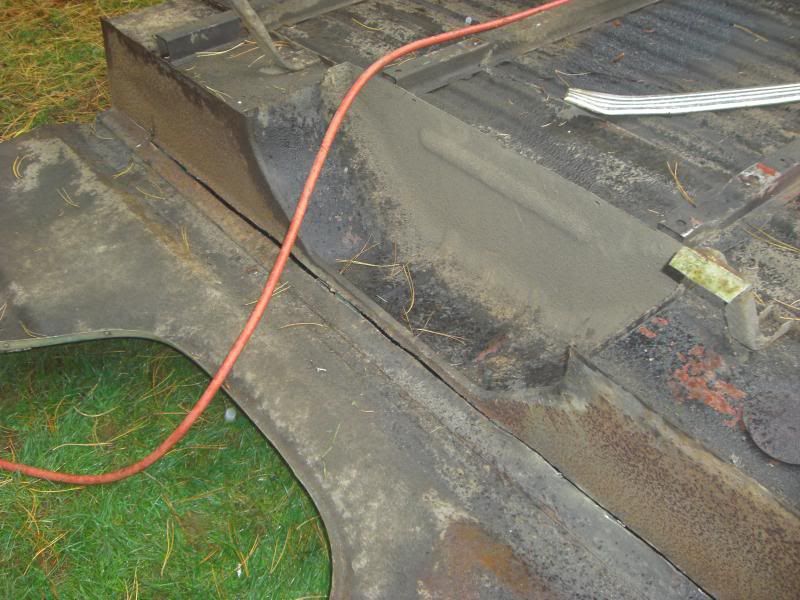
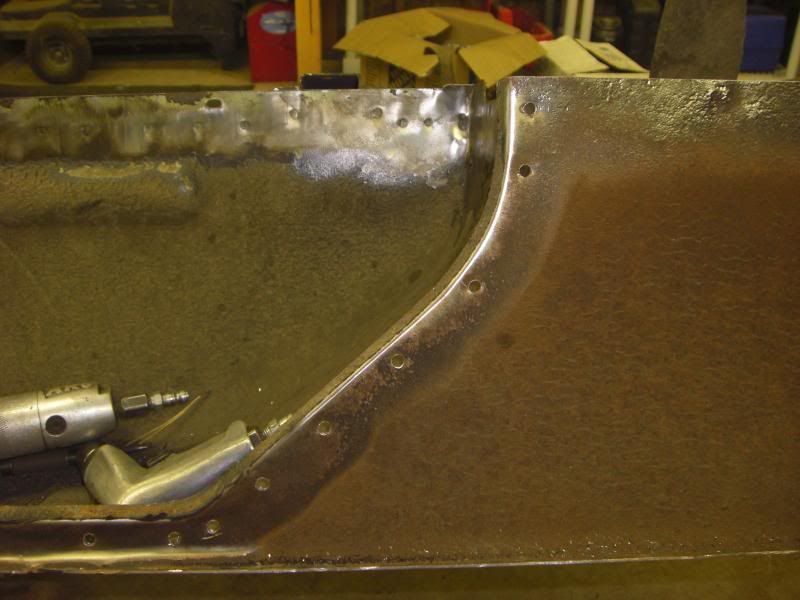
Clean up the wheel houses, bang out the dents and prepare to weld in countless spotwelds. I use zinc weld through primer between panels. Clamp in the wheel houses. Do not tack in one single thing until you are positive of position. Then drink some beers.
Image
Last edited by Aesop on Tue Jan 21, 2014 12:29 am, edited 1 time in total.
67 F250 4x4
Aesop
New Member
New Member
Posts: 57
Joined: Mon Nov 21, 2005 12:12 am
Location: Washington

Re: How I replaced a short bed floor.

Post by Aesop »

I have to replace the flat pans forward of the wheel houses, they are being fabricated at Cleveland Sheet Metal in Vancouver out of 16 gage. I cannot start welding until I set the pans in, so I am going to clean up the shop and drink some beers. I got $39.97 for the scrap.
67 F250 4x4
Aesop
New Member
New Member
Posts: 57
Joined: Mon Nov 21, 2005 12:12 am
Location: Washington

Re: How I replaced a short bed floor.

Post by Aesop »

jimmy828 wrote:I'm digging the post on repairing bed. I just gained a lot of info from your post. I'll be tackling mine next year but installing a wood floor. What i need to know is, can i accomplish this project without BEER? :D
No. You must drink beer. Most of the work is mind numbing. hammering out dents, grinding off spot weld divots, and removing corrosion. I bet I have over 40 hours into this. Of course I can cut that time in half now that I have done it. You have to remember that I will need to sandblast the inner bed, POR-15 the seams, then seal the seams. then the external bodywork and paint.

There is so much work you may hesitate to go out to the shop unless there is a tasty beer in it for you. :wink:
67 F250 4x4
motzingg
Blue Oval Fan
Blue Oval Fan
Posts: 742
Joined: Wed Apr 24, 2013 1:11 pm
Location: Milwaukee WI

Re: How I replaced a short wide bed floor.

Post by motzingg »

sooo you have to destroy one good bed to fix another rotten bed? the goal here is just that you are making it into a short bed?

seeing as i cant find any good-floor bump beds anywhere around here, i'm going to try the same with a later model bed. nice to know what all is holding that thing together... not as easy as i thought, although i've got a plasma, mig and no regard for maintaining any kind of historical preservation/authenticity...
Aesop
New Member
New Member
Posts: 57
Joined: Mon Nov 21, 2005 12:12 am
Location: Washington

Re: How I replaced a short wide bed floor.

Post by Aesop »

motzingg wrote:sooo you have to destroy one good bed to fix another rotten bed? the goal here is just that you are making it into a short bed?

Yes.
67 F250 4x4
Aesop
New Member
New Member
Posts: 57
Joined: Mon Nov 21, 2005 12:12 am
Location: Washington

Re: How I replaced a short wide bed floor.

Post by Aesop »

Got the front pans and installed them, they fit perfect.
Image
Image
My F250 is a 1967, so another bed mod was required.
Image
Image
ImageImage

Now my trim can stay 67. I will either cut down the long bed trim or buy new.
Last edited by Aesop on Tue Jan 21, 2014 12:33 am, edited 2 times in total.
67 F250 4x4
Aesop
New Member
New Member
Posts: 57
Joined: Mon Nov 21, 2005 12:12 am
Location: Washington

How I replaced a short wide bed floor.

Post by Aesop »

I needed to shorten my frame to fit the repaired bed, so I removed 16" from behind the cab and several inches from the tail ends of the frame.
Image
Image
Image
Image
67 F250 4x4
Aesop
New Member
New Member
Posts: 57
Joined: Mon Nov 21, 2005 12:12 am
Location: Washington

Re: How I replaced a short wide bed floor.

Post by Aesop »

I welded the frame together and used the scrap to fab up some large fishplates. These were welded inside the frame channel. Then I removed the sway bar down link bracket from my 87 donor and installed them on the 67. I also had to move my lower shock mounts outboard a few inches to clear the stabilizer bar, I also had to cut and reweld the upper mount to match the new shock geometry. I had to install the bed, it fit perfectly and every hole lines up. I removed the bed after test fit. Then I spent a week with the wire wheel, degreaser, and roloc discs. I painted it with Zero-Rust. I think it looks pretty good.
Image
Image
Image
Image
Time for a beer.
67 F250 4x4
Post Reply